Live chat is the online support service that provides instant help for your customers who are seeking immediate help from a customer service assistant in real time. It normally appears on eCommerce sites in the form of a little text box that says “how can I help you?”. Live chat is a useful tool that can help you to increase your conversion rate and profit.
We are using Zendesk Chat (formerly Zopim) on our stores and want to share the setup instructions with you.
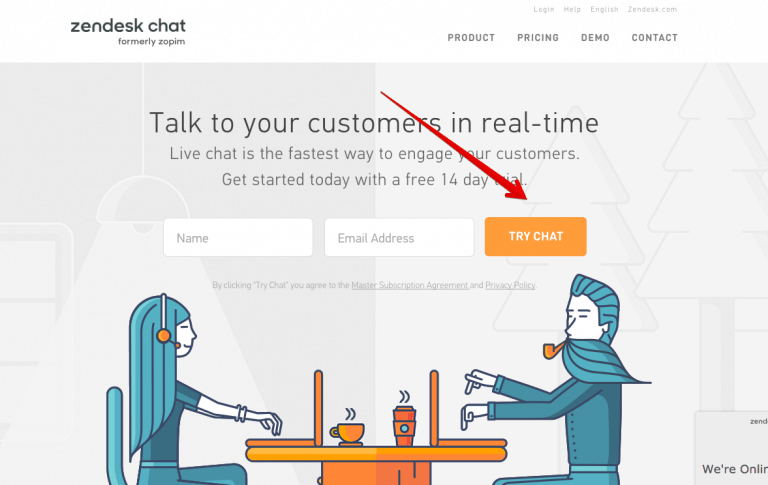
1. Visit zopim.com and enter your name and email. Click Try Chat.
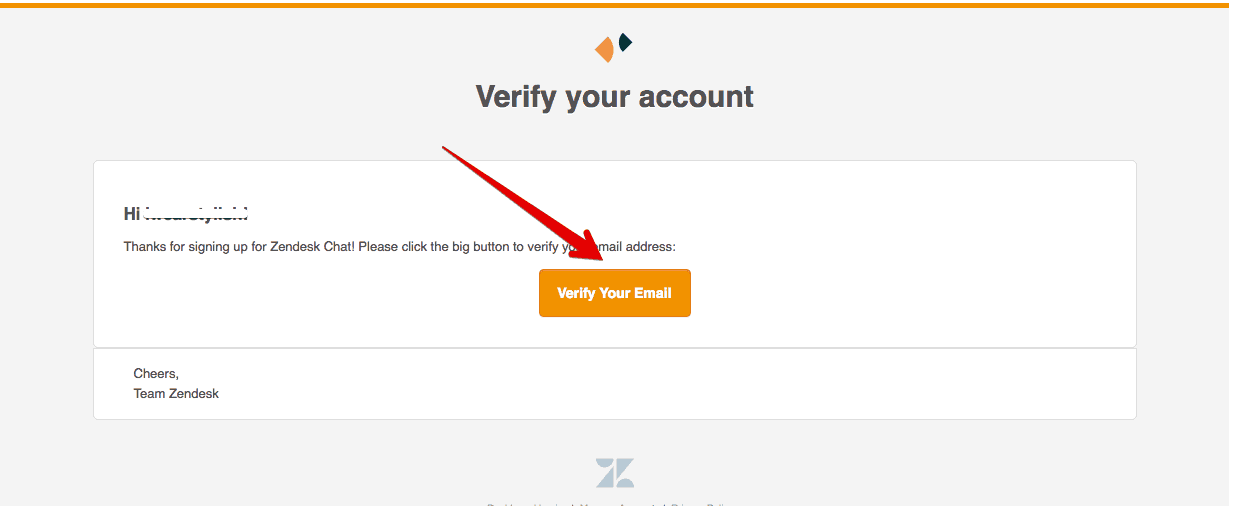
2. You will get an email with a verification link. Click Verify your email.
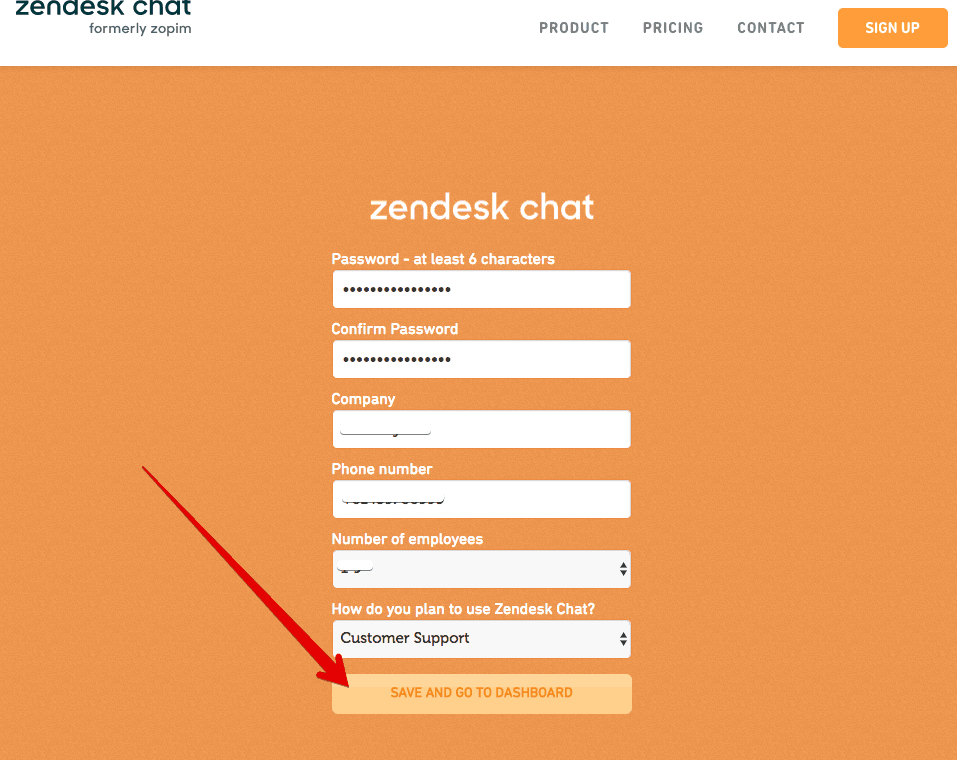
3. You will be redirected to a form where you need to create your login, password and fill some additional information.
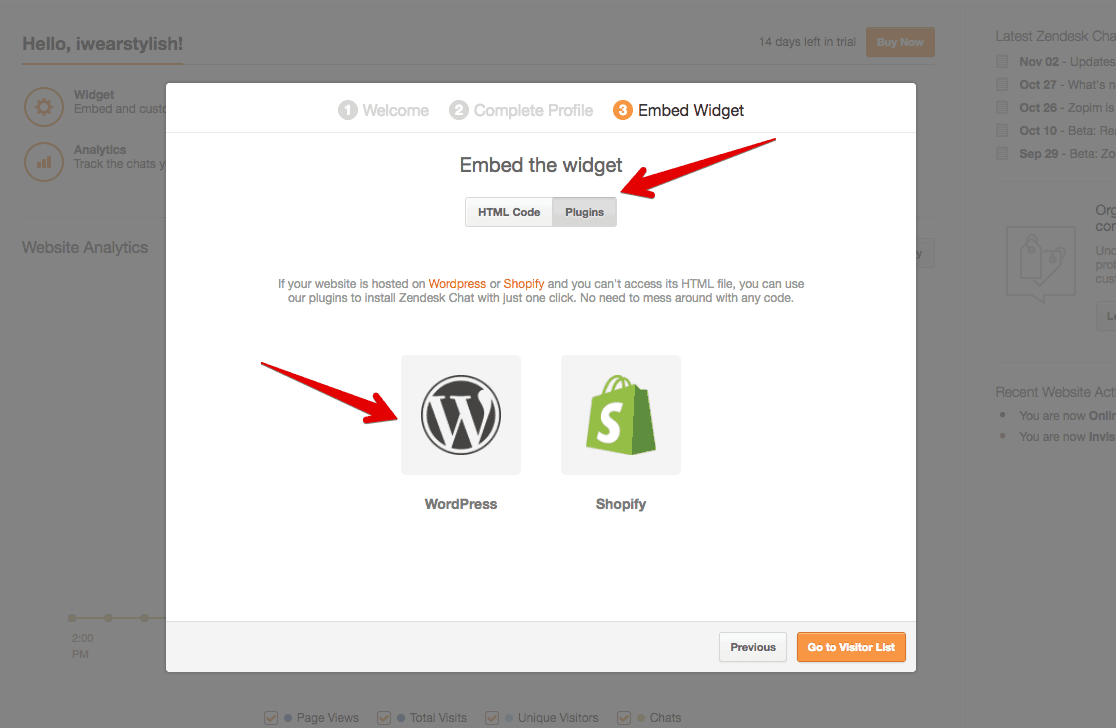
4. On the next step (Embed Widget) you will need to click Plugins and then click WordPress.
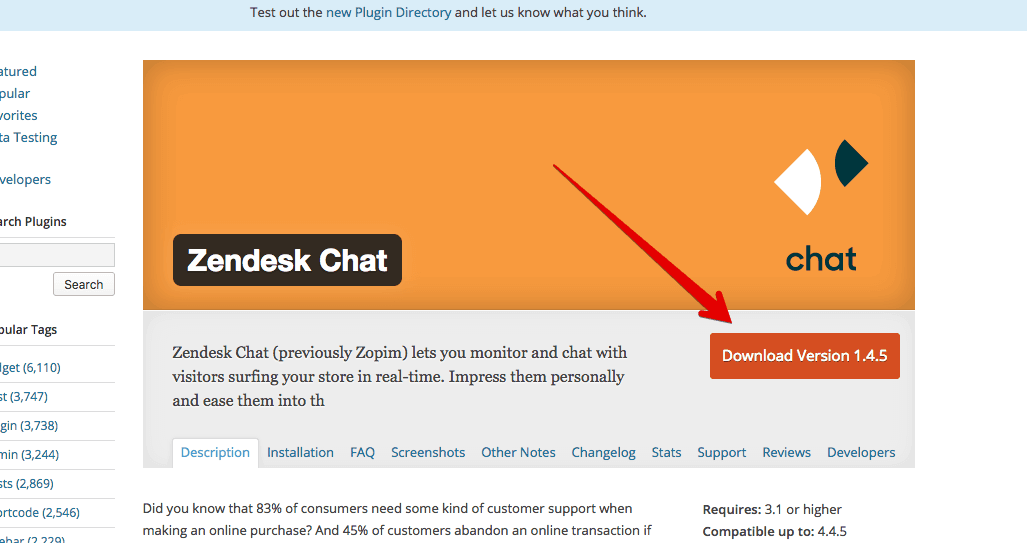
5. You will get to wordpress.org. Download the latest version of the plugin and save it on your PC.
6. Log in WP-admin dashboard of your website, go to Plugins section->Add New->Upload Plugin. Select the plugin file on your computer, click Install Now and then activate the plugin.

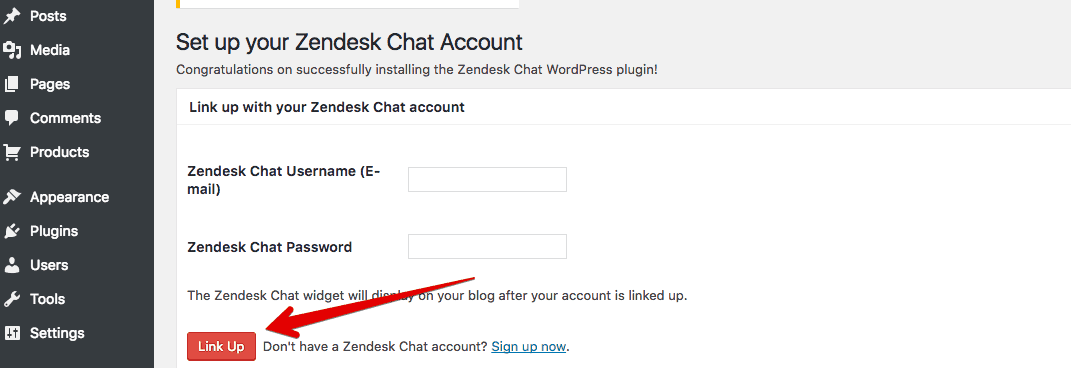
7. Update your browser tab. Click Zendesk Chat on your WordPress menu. Enter your login details and click Link Up.
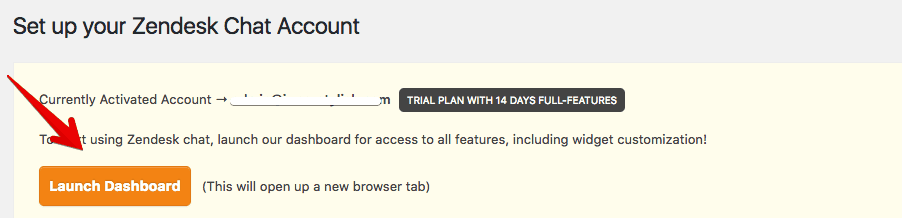
8. Now your Zendesk Chat is activated. You can go to its dashboard to make necessary settings.
9. In dashboard.zopim.com you can chat with your clients, setup your Live Chat, enable/disable the plugin. To learn more about Zendesk Chat and its features we recommend that you check this Knowledge Base and YouTube channel.