The nature of an online business is to sell your products completely on the internet and so, as a result, your customers must purchase and make a judgment on your product based primarily on the photo you allocated. This essentially makes the photo you decide on for your product vital in terms of attracting a potential customer.
Therefore, getting your products photographed correctly and clearly can make a huge difference. On the internet today, there are millions of products for sale through thousands of sites, however when you come across a product you are interested in, the first aspect of the listing you’ll notice is the image of that particular product.
It is very surprising to see that many sellers, whether it be an auction site like eBay or an owner of an online store, don’t make sure that their products look clear and appealing before it is published online. Without an adequate photo, you don’t have much of a chance in converting a sale.
In order to bring your customers closer to purchasing your product, you’ll need to provide clear and appealing photos. You may already have photos provided to you by your supplier, which is fine, however, most of these photos are bland and look too ‘factory-like’ and not personal.
Here are a few guidelines to note while taking photographs of your products;
Use a clean, uncluttered, simple background. What sellers tend to do is take a photo of their product right where they stand, whether it is in their storeroom or bedroom, people will feel it to be unprofessional to see your products sitting amongst clutter and any other objects not related to what you are selling.
If you do have an area with simple surroundings, like a large wall in your office or any other room in your home, then this will do, however it is suggested to raise the product off the ground and take a photo of the product while on a table or on covered boxes against the wall. If you don’t have a clear spot to take photos, a great method would be to purchase either a white or light coloured piece of material like silk and cover your background and table or boxes with this to create your very own photo studio.
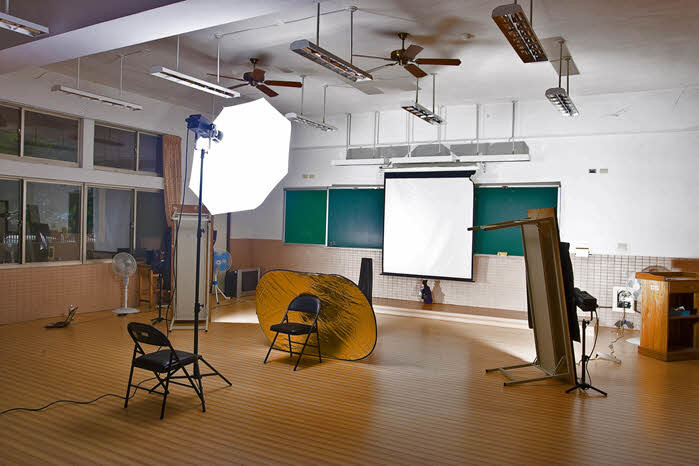
Use appropriate lighting. One of the most important aspects of any form of product photography is good lighting. This is one aspect normally neglected by online sellers who don’t understand its importance.
Having the correct light setting can very much effect whether your product is sold or overlooked by a potential buyer. In order to establish good lighting you need to keep in mind a few tips. The first would be to try and use natural lighting whoever possible, as this will allow the image to look ‘real’ and be shown more clearly with the correct colours as opposed to artificial lighting like down lights, florescent bulbs etc.
Of course there may be a time when the weather is not adequate enough to provide the lighting you require. Then you may need to purchase a small floor spotlight that uses white coloured bulbs. This, coupled with your plain and uncluttered background can deliver brilliant results.
Set your camera to high quality and use a tripod. When you decide to犀利士
finally take a shot of your product, remember to make sure your camera is set to the high quality position, but not the highest, as processing times will increase on your computer and you won’t need to keep the image so large when sending it online.
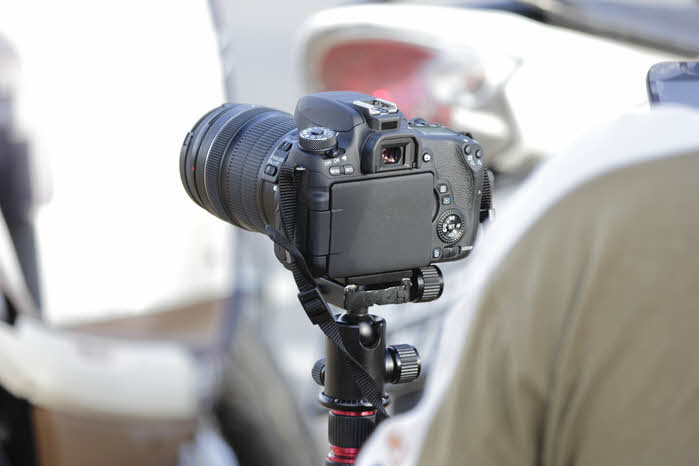
Many sellers online do low to standard quality when taking photos, however, always remember to keep your original images large just in case you need to re-edit or use them again. When taking photos your camera may have an anti-shake feature that will steady your shot to prevent blurring.
However if you don’t have this or still are not able to take a clear shot, then it would be a great idea to buy a camera tripod to fix your camera on and give the stability you require. Simply attach your digital or SLR camera to the tripod, position it so it is level with your product and take the shot.
If your product has more than one side and isn’t flat i.e. : a painting, print etc, then it is highly recommended that you take multiple photos for each image so that your buyers can really embrace your product and feel as if it is physically in front of them.
Some sellers have even begun creating mini videos that show their products functionality, quality and operation. This is an excellent way to integrate and connect your product with your potential buyers and takes online shopping to another level. Once all your photos are taken, make sure to create a specific folder on your computer where they will be copied to. This way when you want to edit or enhance your images you’ll know where to find them.

Editing Your Images
Taking your photos is only the first step in getting your product images ready for the web. In nearly 90% of all photos taken, editing will be required to enhance the image contrast, brightness and any other enhancement it requires.
If you don’t have an image editing program, you may either purchase a professional editor like ‘Corel Draw’ or ‘Adobe Photoshop’. or ‘Adobe Photoshop Express’
However there are a few free image editors available on the internet that provide basic editing features such as ‘IrfanView’ (www.irfanview.com). Whatever image editor you use, all will have the most basic features of editing including: brightness, contrast, sharpen and resize. There are also features like adding text or frames to add to your image some context like a code/model number or your logo.
Once you open your image in your editing software, the first step is to adjust your brightness enough with a good level of colour, but don’t add too much contrast or brightness otherwise your image will stop looking natural.
If your image editor is more advanced and has the shadow/highlight feature then this function is very handy to tone any dark areas in your photo.
Once your photo is edited to your satisfaction, you’ll need to resize the image so that it is not excessively large. Resize the image to about 1000 pixels wide (or tall) as maximum. This will ensure a good size for your customers to view and it won’t take too long to load. When saving your edited images make sure they are saved as JPG files and place them in another folder you can create to store only the edited images of your products.
As far as file names go, you can call the images after their codes which will make it easy for you to identify later on.
Taking the right photos and editing them to look impressive for your potential buyers is an essential step towards the success of your online sales. Browsers on the internet today have many options and stores to buy from, so you’ll need to immediately stand out above the rest in order to get their business.